Shameless recommendation..Β 

Disclaimer: I bought this. I am no expert. I am stingy. What works for me may not work for everyone else. 😁
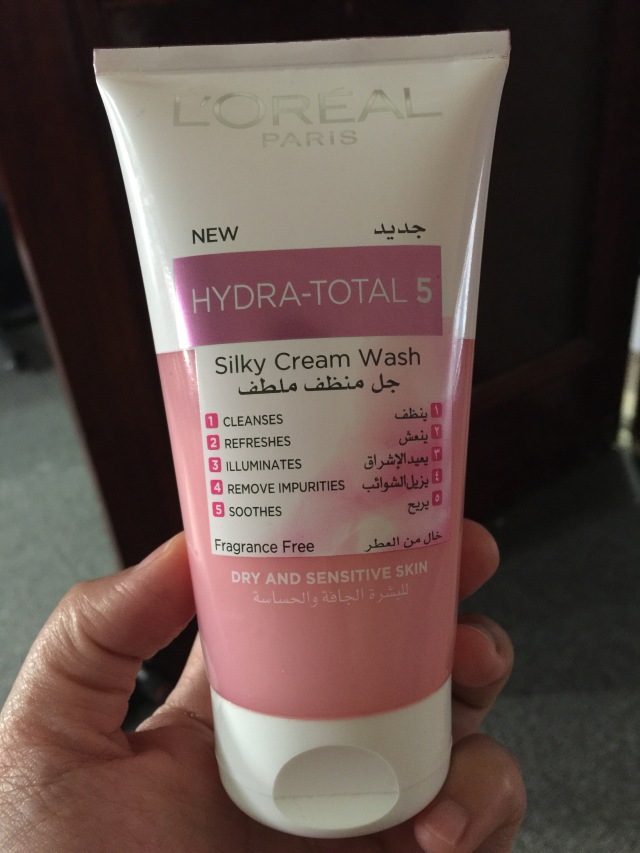

Lately, I have been obsessing about make up. I know it’s a little late. But yeah, I guess this life at home made me try things. Besides, I guess every girl passes this stage. And I’m glad I did somehow.  

Luckily, I am blessed with a good skin in terms of breakouts and blemishes. I don’t have much. And since I am not used to makeup, I was a little afraid of what it can possibly damage. 

So browsing the grocery for a facial wash, I was thinking of an all in one type. I was not planning to buy a makeup remover separately. Here comes this. I am glad I picked this one. I was drawn to it primarily because of the word “Hydra”. I have a very dry skin and I was thinking it would  hydrate my skin at the same time. (Asking too much, right? πŸ™„) But I was not dissapointed with this wash. It removes make up so effectively. How do I know this? Well, the stingy girl that I am, I use mostly waterproof products so I can apply products only once and never retouch. It removes waterproof mascara too. 😍 I love this wash so much. It gives my face a very clean and illuminating finish just like it says in the bottle. No overwhelming scent. No little scrubs. It has a creamy consistency and lathers fairly well in just a little amount. 


Best part? No breakouts!!!

I highly recommend this wash for those who have sensitive standards when it comes to facial washes but refuse to splurge on several types of products. 

Salah and success


I know its not exact. But give and take, would you exchange the risk of eternal suffering for a not even an hour of you daily life? 

“Success comes in different packages” they say. But salah is the sure way to get it delivered in this world and in the hereafter.

Are your lips always peeling?Β 

I have a chronic case of dry lips. They easily chap and peel. That annoying type which makes you bite them off just to get rid of them. πŸ˜”πŸ˜” 

If you have the same problem, try brushing your lips lightly with your toothbrush before going to sleep or before applying makeup. Then apply any moisturizer like a lip balm or vaseline. You’ll notice the difference after one overnight. 

Effective? Tell me about it. πŸ‘πŸ»πŸ‘πŸ»πŸ˜‰πŸ˜‰

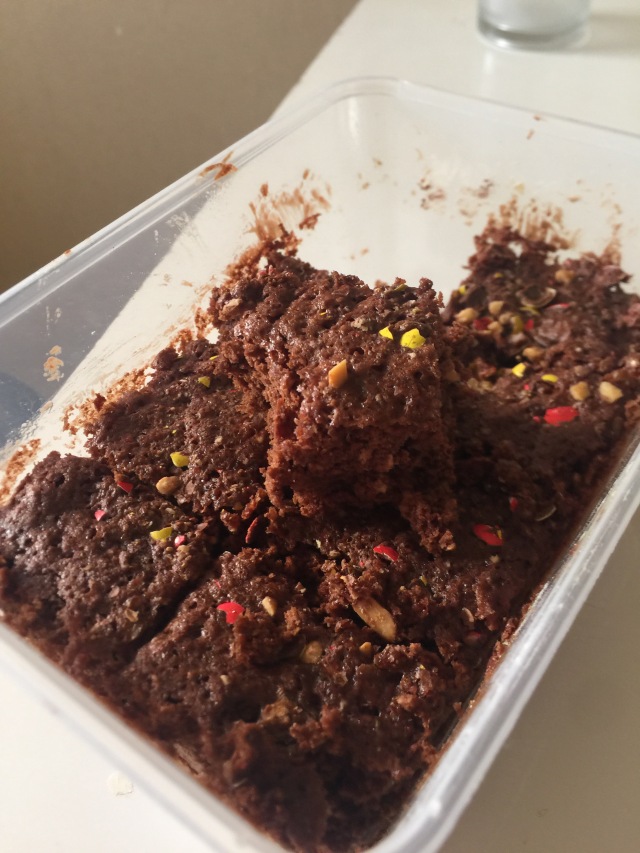
Microwaved Chocolate Brownies


While looking for an easy fix for my sweet tooth craving I came about a number of Microwave mugcakes and microwaved cakes. Knowing it won’t take me much time O decided to try my luck and just go with it. Calories and all. 

For my lazy friends who has no plans of baking seriously like me, I used a rice cooker measuring cup. You’re welcome.

Ingredients: 

  1. 40g butter OR 1/4 cup cooking oil OR 1/4 cup yoghurt
  2. 8 tablespoons of cocoa powder 
  3. 1 egg
  4. Atleast 1/2 cup white sugar (seriously) 
  5. 1/4 cup flour
  6. 1/4 cup oatmeal OR 1/4 cup of additional flour
  7. 1/4 teaspoon estimated of baking powder
  8. Pinch of vanila
  9. Chocolate chunks OR Chocolate candies OR crushed nuts OR whatever you fancy really. It doesn’t matter. 


Q: Why are your ingredients so irresponsible?

A: Because I don’t want to stress myself with strict details. This will lead to frustration and worse I may not proceed with the cooking. More frustration. I am not a cook anyway so I don’t want to burden myself with the responsibility. 

I did not use spatulas and more often than not, I cheat with the chocolate add-in. I used Nips (Local M&Ms) which I bought from the Philippines during my last vacation. πŸ™‚ 
Procedure:

  • Mix all dry ingredients except chocolate add-ins in a microwave safe container. 
  • Mix in all wet ingredients. 
  • Mix chocolate add-ins until satisfied with the amount in the mixture. 
  • Put it the microwave and let it run for 3minutes. 
  • Serve and enjoy. πŸ˜‹πŸ˜‹πŸ˜‹ 

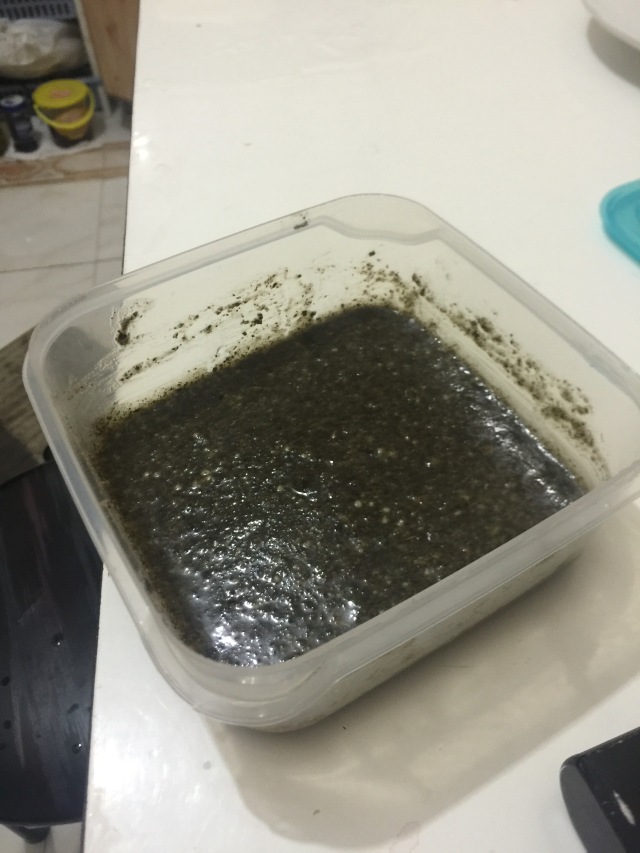
Pesto Sauce from scratch.ο»Ώ (well, technically..)

I have been a fan of pasta since i can’t remember when. One big influence would be my mom’s favorite spicy tuna spaghetti that became our family’s favorite party staple. No occassion goes without it (if we can afford it that time). 🍝🍝🍝 

The fondness grew eventually and the urge to order it out when I was younger was a better option than rice more often than not. But because of the limitations with the restaurants who can serve halal, we can only try so few. Luckily, The Chicken World in Glorietta offered me a place where pasta can be enjoyed without blinking. They serve pesto. I believe this was the first time I tried this sauce and I loved it. πŸ˜‹

So with the immense time that I have, Alhamdulillah,a certain craving to try it at home emerged. 😞 Searching through the web, I found out that it was just an easy bitsy. So easy that luckily we can use dried basil flakes too! Accordingly, as long as its basil, parmesan and olive oil, its still pesto. And boy, was I excited. 


Ingredients that I used based on what I have in my kitchen:

  • Around 3 teaspoons of basil flakes. 
  • 1/4 cup of almond nuts. 
  • 4-5 teaspoons of parmesan cheese 
  • 1/2 cup of olive oil. 
  • Salt and pepper to taste. 

Special thanks to my friend Sawsan who brought me olive oil from Jordan. <happy! πŸ€—>

Procedure:

  1. Place all dry ingredients to your blender. Blend until all the ingredients are grounded. Specially the nuts. 
  2. According to various recipe sites, you have to put olive oil little by little in the blender until your desired consistency. I had it done this way. 

The first outcome of my paste was a little string and bitter. What I did was google how to save a bitter pesto. Turned out that olive oil turns bitter with machine blending. So if you can, because I tried this only once, try to hand-blend olive oil instead. I fixed mine by adding more parmesan and olive oil to thin out the bitter taste. It worked! Just be careful in putting it to your pasta. Add little by little and test. You don’t want to throw good pasta over bad pesto, do you?😜

Eat it with grilled or fried chicken and enjoy! 😎

The steak and the stingy

After marriage, it has been a favorite date idea to have steak. I thought it was just a knack to try something tasty and expensive. But we soon realized that we LOVE steaks. I’m not sure but I think I am into it even more than my husband. When I did my crash diet, I craved badly for steak. So bad I thought I was going to cry when my husband told me to stick to my diet. πŸ˜©πŸ˜…πŸ˜…

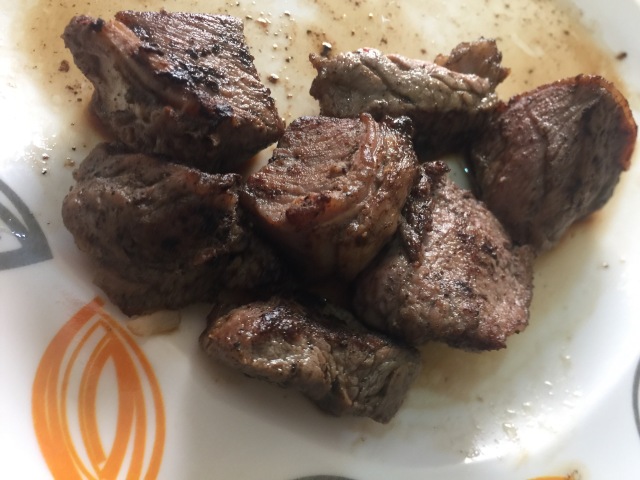
So the stingy prick that I am searched the easiest treasure chest to find for a home-made steak recipe so we won’t go eating outside so frequently. We tried to cook a basic cut we bought from the grocery using a pan-grill and oven. We were ecstatic! It tasted good. But we felt so lazy to do it often that we stopped doing it by the second time. The strict timing and the oven pass was tedious. 

When we went to LuLu Hypermarket the other day, we crossed over some beef cuts that were less expensive than the rest. It was chopped in small portions. Bones-in. We were planning to cook stew with them but luckily, I came across this recipe that will satistfy my steak cravings! Alhamdulillah!! God is so good. 

Link:

http://www.foodnetwork.com/recipes/ree-drummond/steak-bites-recipe.html

This recipe is extremely easy I can do this everyday. Lols. πŸ˜†πŸ˜†

Ingredients:

  • Beef cuts (all types ok) — thick fat layers can be cooked for flavor but you won’t be able to eat it bacause it becomes rubbery. 
  • Salt 
  • Pepper
  • Butter
  • Optional: I am still in search for the herbs that will make my steaks even tastier. Go ahead and try onion powder and paprika if you have them in your pantry. 

Procedure:

  1. Keep the beef cuts in room temperature before cooking. This is a MUST! 
  2. Rub salt and pepper according to taste. 
  3. Heat the pan in medium-high heat until its very hot. This is important. 
  4. Toss butter into the pan. Amount should be more than just greasing the pan but not as if you’re going to deep fry the beef. Don’t worry if it becomes brown. It’s not burnt yet. 😜
  5. Put beef cuts to the pan on one side for 30-40seconds. Then turn on the other for another half a minute or so. Yes, it will create too much smoke. Make sure your exhaust fan is open. 
  6. Take them out of the pan and let them rest on the plate for 5-10minutes before serving. 
  7. Enjoy the juicy steak made in less than 5minutes!! πŸ˜‹πŸ˜‹πŸ˜‹ Yum! 

P.S. I fried a cup of cooked rice using the leftover butter on the same pan. Added a little garlic powder and a little salt. Tasty winner!

Of coconut oils and living healthy…Β 

For a few months now I have been doing research about oils and the bad effects of the regular vegetable oils. I will not discuss the pros and cons here because that would be plagiarism and I am no expert to drop facts despite of plenty articles being readily available in the internet from credible sources. 

What I want to share today is the reality of how hard it is to buy safe foods unless you grow them. Gone are the days where you can just pick something out of your backyard and be happy you have food without shelling out a penny. 

When I finally decided to feed my family healthy edibles– I did not realize that not only will it be expensive, it will also be hard to find. But alhamdulillah, last night I have found a place where I can buy cooking coconut oil by the bottle. It’s this Lulu Hypermarket that my husband has been blabbing about last week. A big well organized supermarket like SM in the Philippines. Most of the people working there are Indians and I guess all can speak English. It was a nice sight actually. What amazed me are the variety of products they offer. Most of them not available in our local hypermarket. Like organic vegetables, salad bars, the local delicacies. It was a sight!! And oh boy did we spend more than we planned. Yes, the coconut oil!! They have it in small amounts and bulk! This is the first time I’m going to be using it so I bought myself a 500ml at around 10sr. The 2liter gallon (with I think an additional 300ml promo) is at 40sr. Wish me luck!!! Bismillah. πŸ˜„πŸ˜„πŸ˜„ <happy!>


Update: The coconut taste appears in some recipes. Especially fried ones. 😞 If you know a fix, post them please. πŸ€”

Pan “grilled” Tilapia


When my mother-in-law came to visit us, she was the one incharge with the cooking. One technique she showed us was how to cook a tilapia grilled style, but in a pan. What is good with this recipe is that you don’t use even a tsp of oil to keep it from sticking to the pan. So if you’re one who is trying to stay away from fried foods, you can still enjoy fish without having to prepare it in water or in a coal-grill. 🐟🐟🐟

The only down side of this recipe is that its a slow cooker. Depends how big and thick the fish is, it cooks at around 30-90minutes. So if you have a lot of time before dinner during a lazy afternoon, you can prepare this tasty meal. No,you don’t have to stay in the kitchen forever. You can multi-task. πŸ€“πŸ˜Ž

Pan-grilled Tilapia

Ingredients:

  • One piece tilapia scales intact. 
  • Salt

Procedure:

  1. Heat pan until its too much. 
  2. Put generous amount of salt all over the pan. 
  3. Place the fish on top and keep in low-medium heat. 
  4. Change sides when cooked. 
  5. Serve with soy sauce, tomatoes and citrus sawsawan. 😜😜

P.S. I placed some bits of lemon around the pan in an attempt to kill off the fish smell. Its a fail. πŸ˜ŸπŸ™Š Keep your exhaust open.